How to Extend Windows Boot Volumes in VMware
I am frequently asked the question about how to grow a VMware virtual disk (VMDK) and have it be recognized by the operating system. If you are trying to simply extend a non-system volume within Windows (ie, anything other than the C:\ drive), then the process is pretty simple (refer to MS KB 325590). But when you are trying to grow a C:\ with windows, you need to get around the limitation of extending the system partition. This is just one more instance where VMware shows how powerful and flexible it truly is.
Disclaimer - Before doing anything like this, make sure you have adequate backups and understand that this is probably not supported by Microsoft or VMware - I take no responsibility for any damage to your systems If you would like to grow a virtual disk the “safe” way (read: much, much slower), you can use VMware’s Converter tool, which will grow the volume for you on conversion, the downside is that it will require the VM to be shutdown during the conversion. The steps below can significantly speed up the process, especially if you have a very large VMDK which needs to be extended.
To grow a system volume, you are going to need a 2nd virtual machine that will act as the helper VM to mount the virtual disk you would like to extend. I will be using 2 virtual machines, both are Windows 2003 standard.
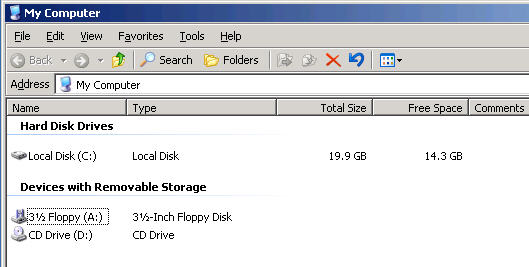
The disk on the VM that I need to extend is currently 20GB, I would like to make this 80GB. I have already made sure that I have enough space on my VMFS formatted storage partition to support this larger VMDK.
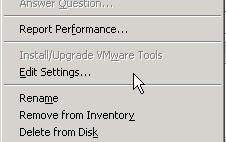
Next, I need to shutdown the VM to extend the disk. There are 2 different ways to extend a VMDK. The easiest way to grow the VMDK disk is to right- click the virtual machine in the VI Client, and select “Edit Settings”
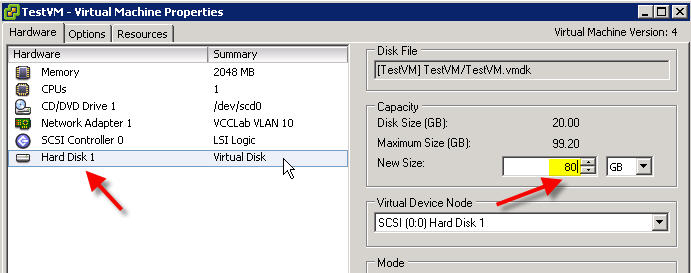
Then Click on the virtual disk object, and enter in the new size of the VMDK (in my case I would like to extend this to 80GB), then click OK.
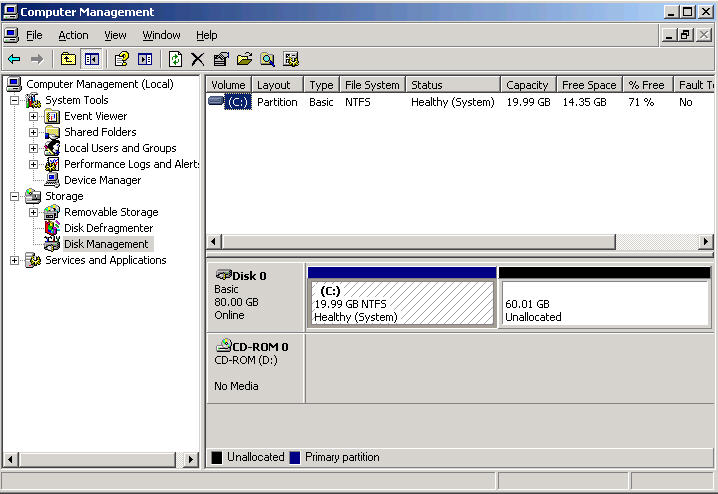
Power on the VM to make sure the OS can see the additional space; right-click “My Computer” » “Manage” » “Disk Management”. It will not be able to use the space until we tell the OS to extend the partition to fill the remaining space. You should see something similar to the image below.
Now, shut the VM down again, and also shutdown the helper VMh, the virtual machine that you are going to use to mount and extend the disk. Once both virtual machines are shutdown, we are going to remove the virtual disk we are growing from our VM, and attach it to our helper VM. To do this, right click the VM we are growing and select “Edit Settings”, click the virtual disk resource, and click “Remove”.
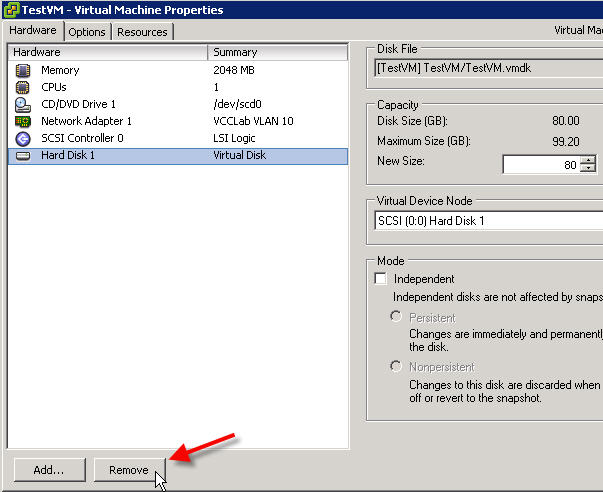
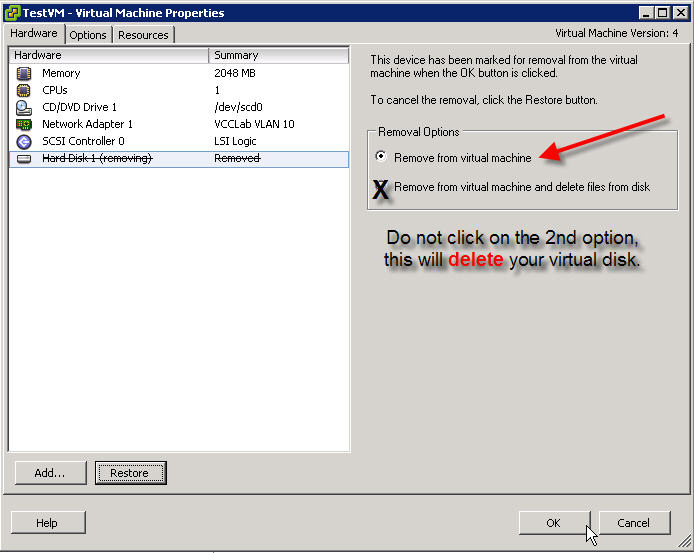
Click the option to “Remove from Virtual Machine”, do NOT click the other option, this WILL delete your virtual disk.
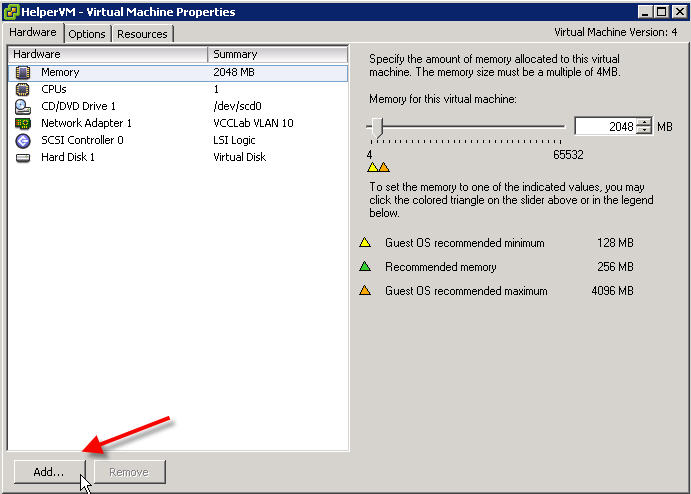
Now right click our helper VM, select “Edit Settings”, then select “Add” toward the bottom of the screen.
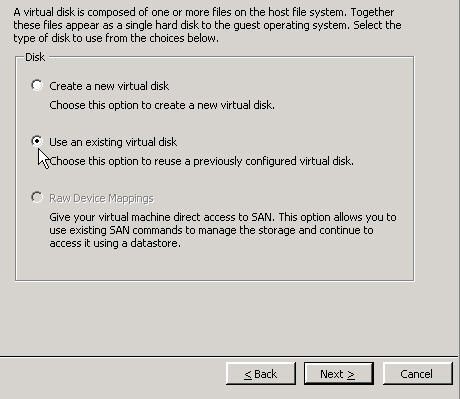
Select “Hard Disk”, next, and select the option to use an existing virtual disk.
Next, you will need to browse for the VMDK file that we are extending. Since we have already grown the virtual disk to 80GB you will notice that in the size column for this VMDK.
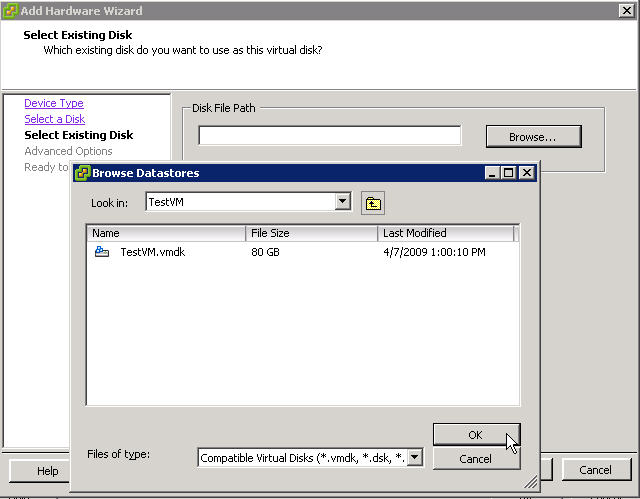
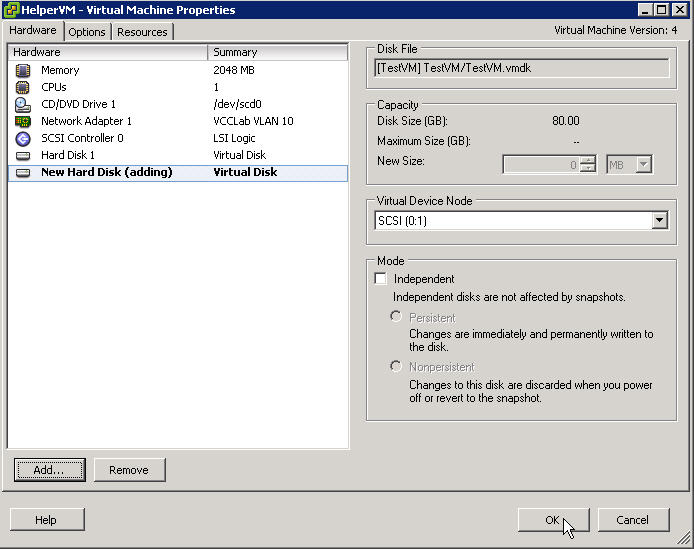
After selecting the full path to your virtual disk, click thru the last couple pages, and you will see the virtual disk added to the VM’s hardware list. After clicking OK, power-on the virtual machine, logon, and you will see the other VM’s disk connected at D:\ (or the next available drive letter).
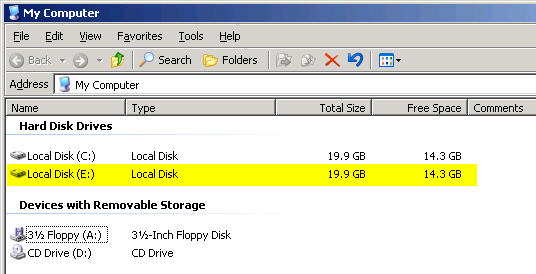
Now, we can finally run diskpart to extend our volume. Click “Start” » “Run” » type “cmd” » type “diskpart”. You should see the diskpart command prompt.
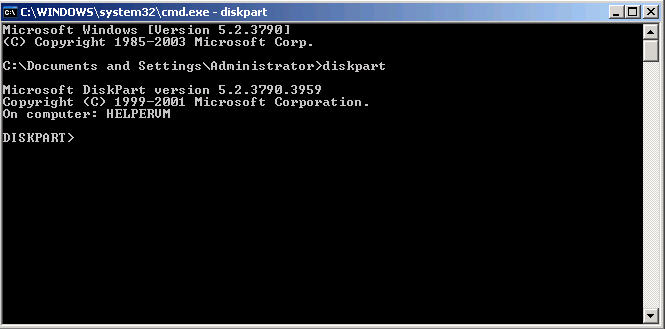
Type “list volume” to display a list of all the attached volumes:
DISKPART> list volume
Volume      Ltr  Label        Fs     Type        Size     Status     Info
----------  ---  -----------  -----  ----------  -------  ---------  --------
Volume 0     C                NTFS   Partition     20 GB  Healthy    System
Volume 1     D                       CD-ROM          0 B  Healthy
Volume 2     E                NTFS   Partition     20 GB  Healthy
We want to select the system volume 2, the boot volume is the disk for our helper VM.
DISKPART> select volume 2

Volume 2 is the selected volume.
Then we extend:
DISKPART> extend

DiskPart successfully extended the volume.
If you launch disk management, you will see the volume is now a single 80GB partition.
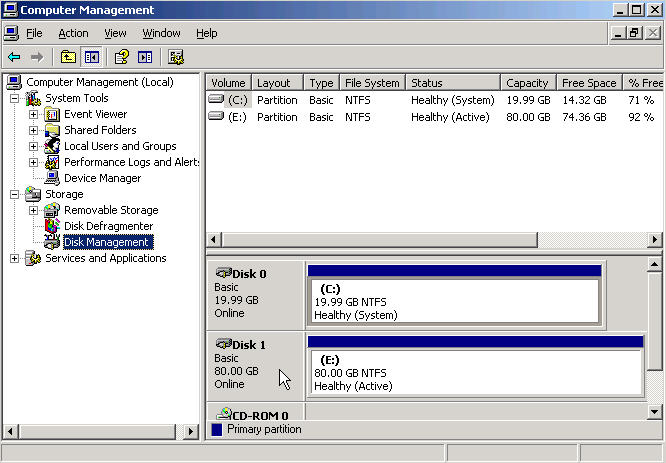
Finally, we shutdown our helper machine, detach the disk, and reattach it to our original VM. When you power on the original with our extended disk, you will immediately see the additional space. You may be prompted to reboot one time, so that the operating system will be able to work with the larger re- added disk.
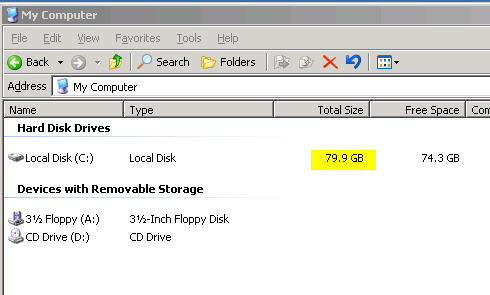
Enjoy your additional space!
